Keeping your emails organized is essential to finding the ones you need when you need them. One easy way to do this is by creating folders and moving your messages to them.
If you use Gmail, you’ll see default folders, those already created for you, in the menu on the left side. When you set up your own, they’ll fall in line in that same spot, giving you a quick and easy way to organize your inbox. Here’s how to create folders in Gmail and move emails to them.
Create a folder in Gmail
Before we begin, it’s important to note that Gmail doesn’t refer to folders as “folders.” They’re called “labels,” but function the same way as folders.
When you create a folder for the first time, you might want to set up a few that you know you’ll need. The best place to do this is in your Gmail Settings. Moving forward, you can then create another new folder a few other ways too.
Step 1: Head to the Gmail website, sign in, and select the gear icon on the top right.
Step 2: Choose See all settings at the top of the menu that appears.
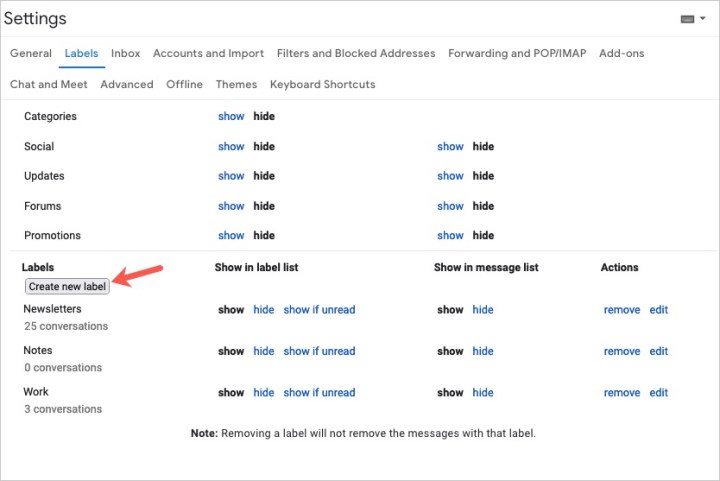
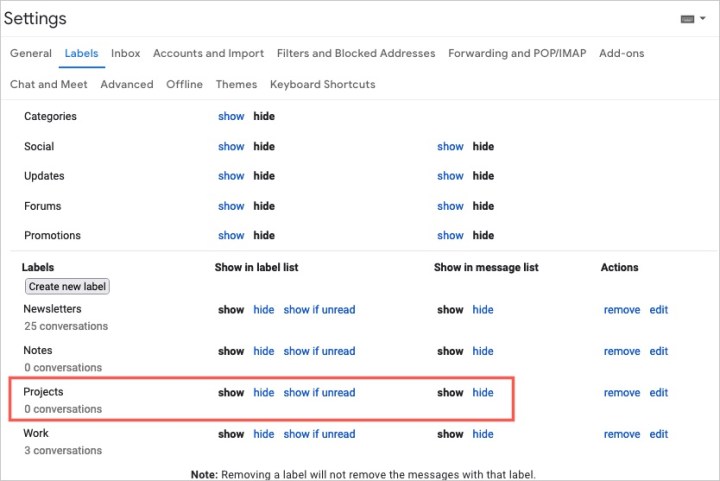
Step 3: Select the Labels tab at the top of the Settings page.
Step 4: You’ll first see System Labels, which are the default folders mentioned earlier. Navigate further down to the Labels section and select Create new label.
Step 5: Enter a name for the label (folder) and optionally check the Nest label under box and pick a parent label in the drop-down list.
This is a good way to structure your folders with subfolders. As an example, you can make a parent folder for Clients and set up subfolders beneath it for each of your clients.
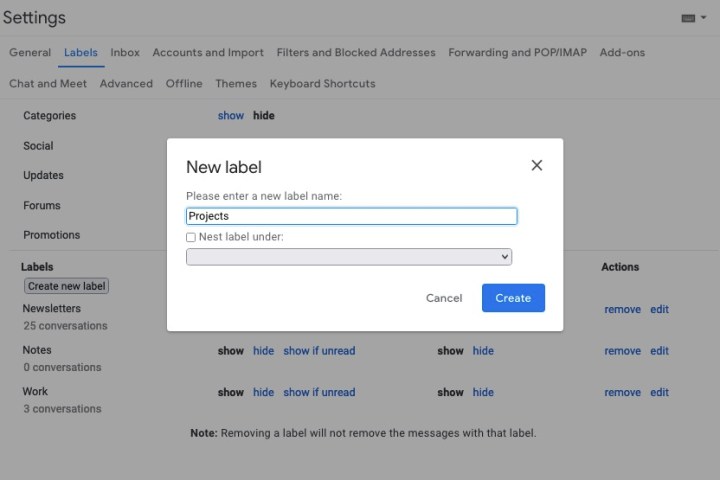
Step 6: Select Create and you’ll see your new label (folder) in the list.
You can choose where to display it using the Show and Hide options below the Show in label list and Show in message list headers.
Step 7: When you finish, you can head back to your Inbox by choosing that option in the left-hand menu.
Once you get the hang of using folders, you can create a new one right from your inbox. Just do one of the following:
- Select the Create new label plus sign icon in the left-hand menu. This icon is directly to the right of the Labels header in the left hand menu.
- Choose Move to or Labels from the toolbar at the top and pick Create new. This applies the selected email to it.
- Right-click an email, hover your cursor over Move to or Label as, and pick Create new. This also applies the selected email to it.
Move an email to a folder
You have a few different ways to move emails to folders in Gmail. Probably the simplest way is to use the Move to option in the toolbar.
Step 1: Select the email you want to move in your inbox by ticking its corresponding checkbox.
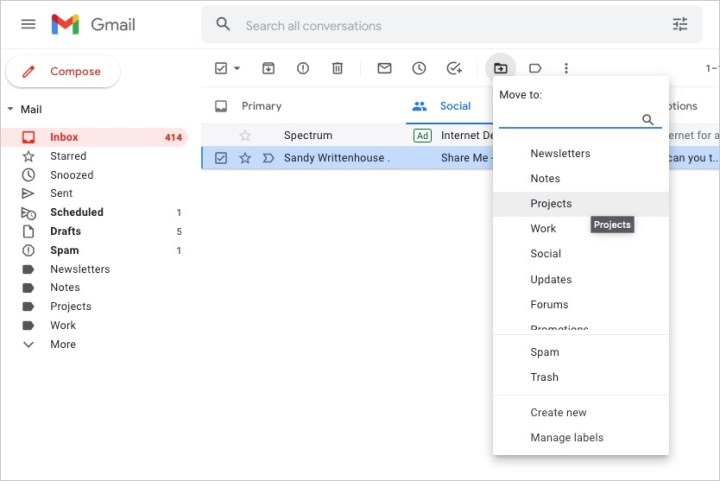
Step 2: Pick the Move to option in the toolbar at the top. The Move to icon looks like a file with an arrow in the middle.
Step 3: From the menu that appears, choose the folder where you want to place the email.
When you do this, it removes the email from your Inbox and places it in the chosen folder. This is a great way to keep your inbox neat and tidy.
Step 4: You can also move an email to the folder by doing one of the following:
- Drag the email from your inbox to the folder in the left-hand menu.
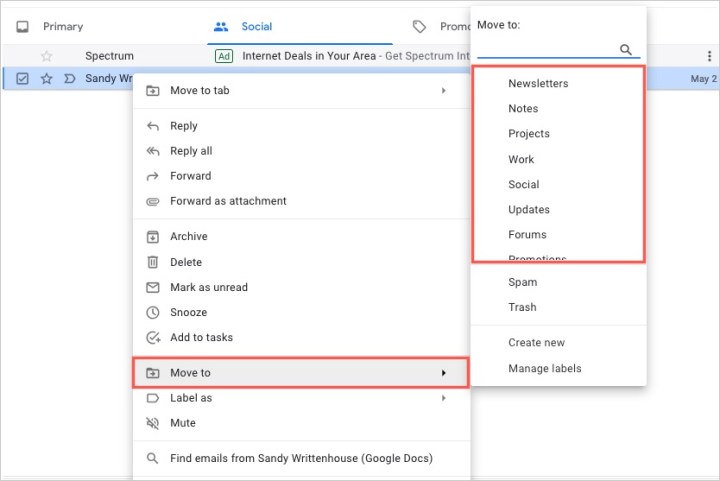
- Right-click the email, hover your cursor over Move to, and choose the folder.
By creating folders (or labels) in Gmail, you can keep your messages organized for work, school, your personal life, or whatever you find most helpful.
For more, take a look at Gmail keyboard shortcuts you should know or how to find archived emails in Gmail.
Editors’ Recommendations